1. Installation & Setup
The FANUC robot vision example is a KAREL library (W_LIBRARY) together with a set of TP programs. Before running it, prepare the robot controller, the network connection to the Machine Vision Device, and the tool frame.
Tested configuration
| Component | Value |
|---|---|
| Controller | FANUC R-30iB Mate Plus |
| Controller software | V9.40 (use the same version on your controller) |
| Robot arm | LR Mate 200iD |
Files
The example files are in the sources directory of this repository:
| File | Description |
|---|---|
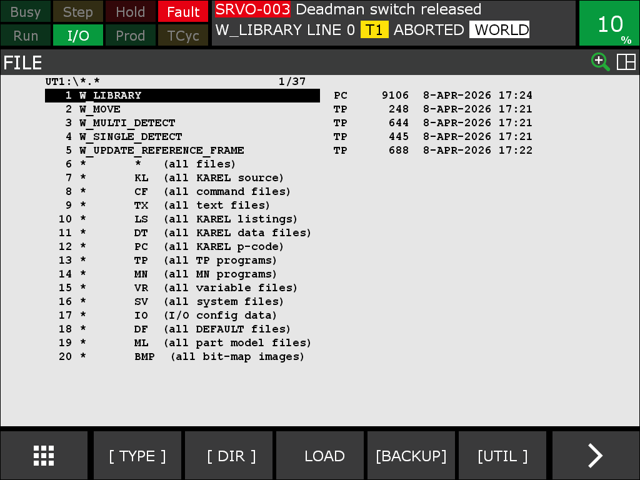
w_library.pc |
The KAREL library containing all vision routines. See User Configuration. |
w_single_detect.tp |
Single object detection example. |
w_multi_detect.tp |
Multiple object detection example. |
w_update_reference_frame.tp |
Reference-frame update example. |
w_move.tp |
Helper program that moves the robot to the exchange pose register (PTP or LIN). |
Commissioning steps
Network setup of robot controller
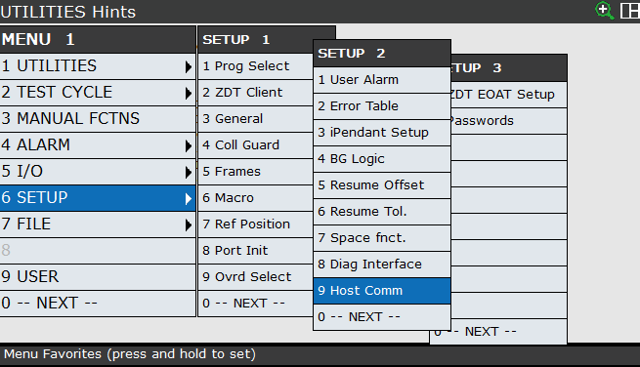
Adjust the network settings of the robot controller so it can reach the Machine Vision Device (by default 192.168.100.1). Go to Menu → (6) Setup → Setup 2 → (9) Host Comm.
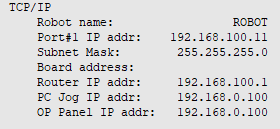
Select TCP/IP and enter the IP address of the robot controller (e.g. 192.168.100.11).
|
|
Socket messaging
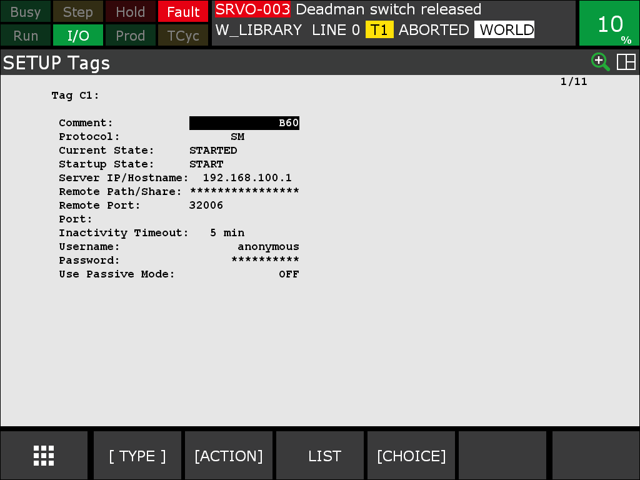
To set the socket messaging client information, go to Menu → (6) Setup → Setup 2 → (9) Host Comm. In this window, select Show (bottom bar) → Clients. Select the client you want to use — in this example, C1. Set the IP address of the Machine Vision Device (by default 192.168.100.1) and the port (by default 32006).
For details, see the Socket Messaging section in the FANUC operating instructions.
Warning
The client tag configured here (e.g. C1:) must match the w_client_tag KAREL variable. See User Configuration.
Tool setup
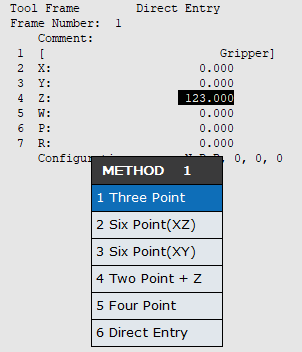
Go to Menu → Setup → Frames → Other (bottom bar) → Tool Frame. In this window, select the tool ID. Select Method (bottom bar) and pick the method for setting the TCP (e.g. Three Point).
System variables
Check the system variables. Go to Menu → Next → System → Variables.
$KAREL_ENB needs to be set to 1 to enable working with KAREL files. W_LIBRARY is a KAREL file, so this is required.
Transfer files to the robot
To transfer the files to the robot, use FTP (set up similarly to socket messaging) or a USB stick.
For transferring the files via a USB stick:
- Go to Menu → File → UTIL (bottom bar) → USB on TP (or Teach Panel Slot) / USB Disk (or Controller Slot).
- Select and enter
*(all files) → Copy (bottom bar). - Select the target device Mem Device (MD) → select DO_COPY (bottom bar).
Note
On the Machine Vision Device website (Jobs → Processing Instance → Robot Server), make sure the robot server is active and the robot manufacturer is set to Generic (string based). See Settings on Device Website in the wenglor robot vision manual.
Initialize the KAREL variables
The KAREL program uses several variables that are uninitialized at first. To set the default values, run the KAREL program W_LIBRARY once. It will return a cam error, but that is expected in this case. After that you can adjust the variables to your use case in User Configuration.